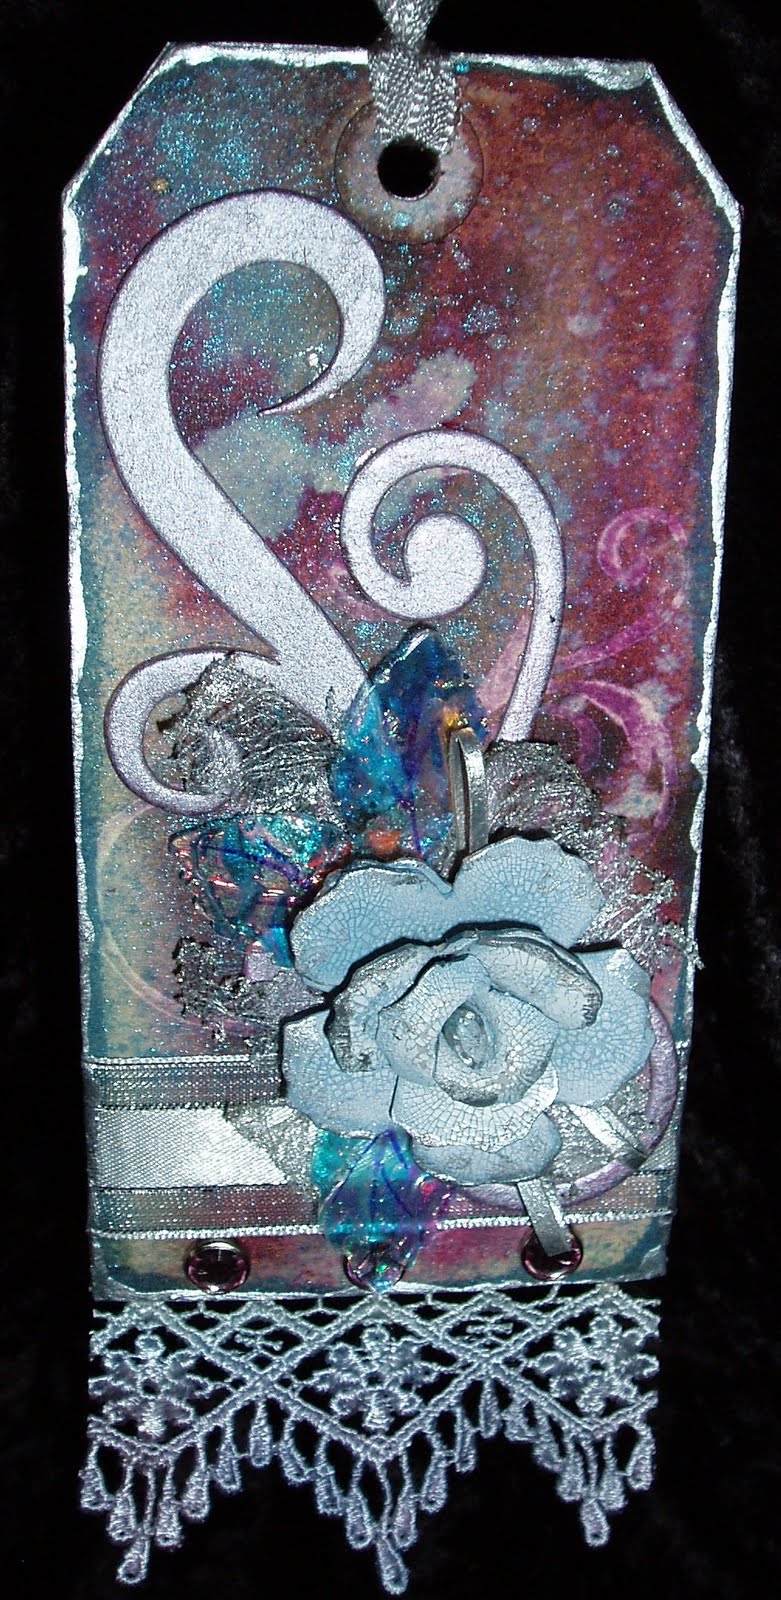
'Beauty'
This is one of two tags that I wanted to teach to the ladies, but never had a chance to do. These are the instructions:
Steps:
1. Choose the colours that you wish to use from the Glimmer Mists. Because it is a small area we are working on, I would recommend that you use between 1 – 3 colours.
2. Select a stamp to emboss on the background and choose an embossing colour to complement these.
3. Rub the tag all over with the anit-static powder. Load the stamp with embossing ink and press the stamp into the tag where you want the image to go. Hold the tag over a piece of paper or tray, and sprinkle a generous amount of the embossing powder over the stamped area. Tap the tag gently on the back to dislodge any excess powder.
4. Heat the embossing powder using the heat gun. Angle the heat gun away from you and hold the tag at an angle so that you can see when it changes from matt to gloss. Once it has turned glossy, move the heat to another area so you don’t burn the tag.
5. On a craft sheet (or in our case the piece of plastic taped to the table) spray two colours of Glimmer Mist in a random pattern just bigger than the size of the tag. Take the tag and drop it onto the ink and then ‘smoosh’ it around before peeling it off. The ink will blend and cause rivulets to form and create random patterns on the tag. Dry off using the heat gun avoiding over heating the embossed area you have done first.
6. Using a piece of Blending foam pressed onto the Stazon stamp pad, gently rub over the edges of the tag to give it an aged patina.
7. Select a picture to mount onto chipboard and trim to size using a craft knife, steel ruler and cutting mat. Edge the picture using metallic paint in either gold or silver, depending on the base colour you have used in your background.
8. Using a strip of Grunge Paper, cut the ‘trellis’ or a design of your choosing on the cuttlebug. Ensure that when you put the die in the machine that the foam side is up and the Grunge paper is on the top between the two plastic sheets before operating the machine, as the dies can be damaged if this is done incorrectly.
9. Paint the cut-out using metallic paint to match the border on your picture.
10. Tear out your word and gently rub the edges with Distress ink to match you colour scheme.
11. Glue on the cut-out ‘trellis’, picture, word, German scrap and attach peals or rhinestones.
12. Edge the entire tag in metallic paint the same as around your picture.
13. Your tag is COMPLETE!!

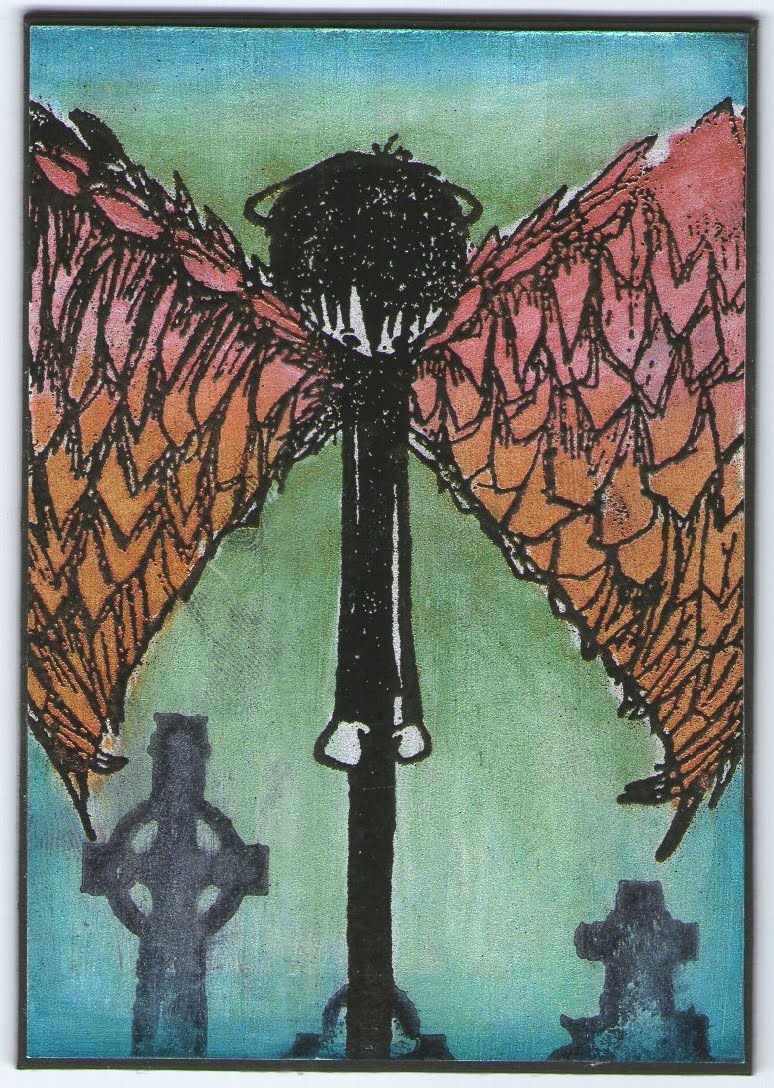
'Not all angels wear wings'
These are the instructions:
Steps:
1. Using the 5cm wide masking tape, cut 3 or four pieces slightly longer than the length of your tag. Tear these lengthways into strips of varying widths. Arrange these onto the tag in layers at intervals, not just working from one side to the other. Once your tag is covered, trim the excess from the edges.
2. Mix Jo Sonja Pearl paint (about the size of a 10 cent piece) with the colour of your choice (I have used Colony Blue) only a small smear as you are using very small quantities. Use the popstick to mix the colours together.
3. Using the rectangular piece of plastic, (pseudo credit card) pick up as much of the paint as you can and starting at one end of the tag and pull the paint over the top. This is just like silk screening with a mini squeegee. If the tag is not covered repeat the process. You will need to watch out for the small ends of the masking tape, as the ‘pulling’ action of the plastic card can loosen them.
4. Whilst this is drying, cut out your picture trying to include as much detail as possible to create interest.
5. When the tag is dry (this can be finished with the heat gun, but be careful not to over heat as the masking tape will blister) rub all over with the anti-static pillow, this stops the embossing powder attaching to places other than the image you want. (Painted surfaces do not take ink well, so embossing is the best way to get an image onto a painted surface.)
6. Select the stamp you want to use and cover with embossing ink. Press the stamp into the tag where you want the image to go. Hold the tag over a piece of paper or tray, and sprinkle a generous amount of the embossing powder over the stamped area. Tap the tag gently on the back to dislodge any excess powder.
7. Heat the embossing powder using the heat gun. Angle the heat gun away from you and hold the tag at an angle so that you can see when it changes from matt to gloss. Once it has turned glossy, move the heat to another area so you don’t burn the tag.
8. Using a piece of Blending foam pressed onto the Stazon stamp pad, gently rub over the edges of the tag to give it an aged patina.
9. Glue on your picture and the small piece of German Scrap to the bottom.
10. Mount your quote onto black card and using Rub ‘n’ Buff highlight the edges in metallic shine on both the words and around the edges of the tag.
11. Glue on the quote.
12. Glue the beaded trim to the back of the tag.
13. To finish, I have glued another tag to the back to hid any paint or other work related mess.
14. Your tag is COMPLETE!


 As you can see, I went a little bit 'nuts' with my old Dragonfly stamp from Stampers Anonymous. I wanted to try several different colour schemes and have added some Martha Stewart micro beads to the corners for highlights as well some Ranger Stickles to add glitter to the wings without interfering with the Smooch colour underneath. (The scans do not do justice to the colours I have used.)
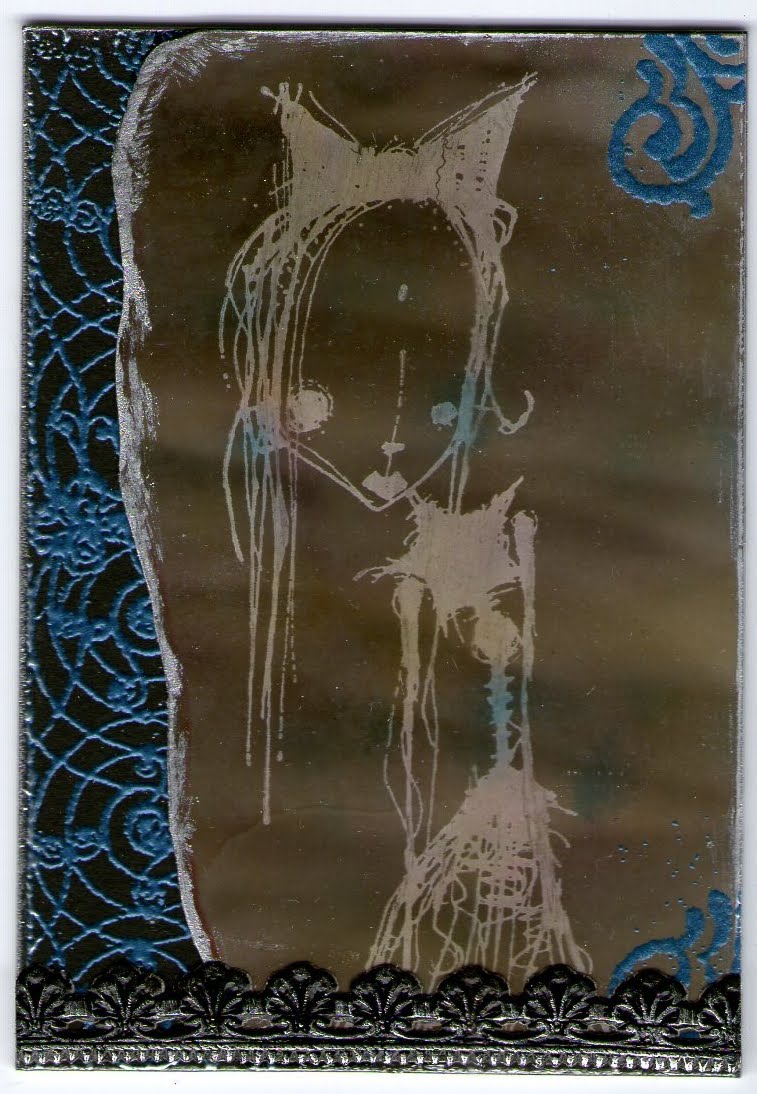
 'Moth Fab' is an old stamp I got from Stampotique a while back but the fance is one I received yesterday and thought would add another layer to this piece.
 'Angel Boy'


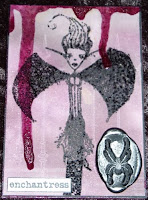

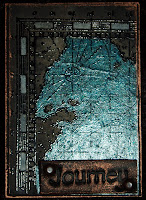 I have used the 'Bleach' technique on this ATC on black cardstock. The bleach eats away the black pigment to leave an earthy brown tone. I have then used some Tattered Angels Glimmer Glam to paint over the top of the ocean and a white marker to add highlights to the map border.